In this guide, we are going to show you how to clean in between car seats like a pro!
A car is a place where we spend some of the most valuable time of our day. We commute to work, drive home from soccer practice and take road trips with friends.
But many people don’t realize that there are few things more important than keeping your car clean- especially in between the seats!
You might not be able to see it very well but dirt and grime can build up over time.
Eventually, they can lead to both health hazards and unpleasant odors.
- The Importance of Cleaning Between the Seats
- How to Clean in Between Car Seats
- Step-by-Step Instructions on how to clean in between car seats
- Step 1 – Declutter
- Step 2 – Remove the seats (Optional)
- Step 3 – Vacuuming
- Step 4 – Clean the folds of your car seats
- Step 6 – How to clean in between car seats and center console
- Step 7 – How To Clean Car Seat Rails
- Step 8 – How to remove spots and stains
- Step 9 – Dry out the car
- Step 10 – Freshen up the car
- Tips and Tricks for a Quick and Easy Cleanup
- Conclusion
The Importance of Cleaning Between the Seats
Cleaning between the seats is a practice that should be done regularly.
Cars are hard to clean because of the small gaps and different surfaces. The most common area where grime builds up in between the seats.
By cleaning this area, you can prevent health hazards in your car while keeping it smelling fresh!
Also, if your car smells bad then it makes sense that you wouldn’t want to ride with someone else in there anyway.
So now that we’ve addressed some of the reasons why you should clean your seats and the tight space in between, let’s go ahead and dive right into how to do it!
How to Clean in Between Car Seats
For this cleaning activity, you need to prepare the following items before you begin:
1. Trash bag
2. Vacuum
3. Microfiber cloth
4. Blowgun / compressed air duster
5. Upholstery cleaner
6. Bristle brush
7. Detailing brush / small brush
8. Steam cleaner (optional)
Step-by-Step Instructions on how to clean in between car seats
Now that you have the right tools, here’s a step-by-step guide to clean the spaces in between your car seats.
Step 1 – Declutter
Before anything else, to get rid of everything that is in the way.
You don’t want anything blocking you from accessing the spaces between and under the seats where dirt and grime will collect.
Move any bags, food wrappers, receipts, coins, trash, and anything else from the gaps between the seat and center console so you can have easier access to clean it!
Step 2 – Remove the seats (Optional)
To clean the space in between car seats properly, you can remove the seats from the car.
This is important because you can easily access the dirt and grime that has collected between the gaps of your car seats.
Caution: Make sure you know how to remove your car seats before you do this. Exercise caution when removing your seats! If you don’t know how to do this, have a professional handle it for you.
Here’s a Youtube Video on how to remove the car seats from your vehicle:
Once you have removed the seat, make sure that you can access all parts of it before moving on to clean it.
Question: “Can I still clean my car without removing the seats ?”
Answer: Yes, you can still clean the seats without removing them.
Taking seats out is not an easy task. Plus, it’s tricky on some vehicles with electronic features, where for instance the airbag warning light might come on.
Alternatively, you can use a long narrow nozzle, compressed air, or vacuum with a crevice attachment.
Just move the seats all the way back, clean the front area. After that move the seat all the way forward and clean the spaces behind and underneath.
Step 3 – Vacuuming
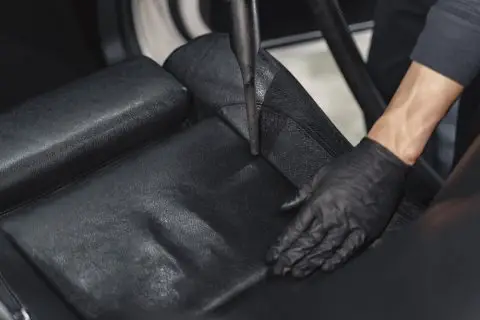
Now that you have decluttered your car and removed the sets, it’s time to vacuum them!
Use the vacuum attachment that has a brush attachment to clean the different parts of your seats, the center console, the surface under the seats as well as the rails.
Alternatively, you can also use a compact brush/broom and dustpan along with a dry microfiber cloth to get rid of the dust in your car’s interior.
Step 4 – Clean the folds of your car seats
When you’re cleaning in between any gaps of your car seat, it will be important to clean the folds and crevices as well, especially if they are dirty.
When you do this, use a cloth that is specifically designed for car upholstery.
We recommend microfiber cloths because they are soft, absorbent, and will clean in between the gaps of your car seats thoroughly.
If you don’t have any, then I suggest opting for old t-shirts or sheets instead.
A tool known as a blowgun or compressed air can is an effective way of cleaning consoles and cup holders. They are all designed for reaching difficult spots in your car’s interior.
Question: “How to clean in between car seats using upholstery cleaner?”
We highly recommend Chemical Guys Total Interior Cleaner & Protectant.
It has a gentle formula to clean and protects virtually all car interior surfaces of your car. Alternatively, you can also try these products:
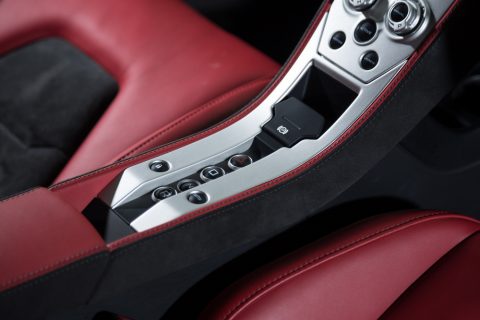
Step 6 – How to clean in between car seats and center console
The car’s console is a constant target of buildup. Since your console is right in front of you all the time, it tends to collect things like receipts, junk food wrappers, coins, and so on…
First, spray it with upholstery cleaner. Let it sit for a few minutes.
Then take a wet microfiber cloth and wipe down the console.
You can also use a vapor steamer for a deeper clean. However, be careful with the steam though because you don’t want it to touch the seats!
When you’re finished wipe it down with a dry microfiber cloth to remove any excess moisture.
Step 7 – How To Clean Car Seat Rails
Adjusting your seat often seems like the problem is with the seats themselves.
The reality is that it’s usually a build-up of crumbs, spills, and all sorts of other filth that is the true culprit.
As you drive down the road, crumbs get ground into the cracks, causing them to stiffen up and wear out faster.
First, use a blowgun or compressed air, then vacuum the car seat rails to get rid of any loose dust and grime.
Then use a detail brush to clean in between the gaps of the rails. You can also use any type of brush that will fit into the gaps.
Alternatively, you can also use a small piece of microfiber cloth or cotton swabs to clean in between the gaps.
This might take a little more elbow grease than vacuuming but it will be well worth it when you’re able to get into the nooks and crannies of the seat rails!
Step 8 – How to remove spots and stains
Stains are one of the main reasons that car seats get dirty.
And they’re also one of the biggest indicators that you need to clean your car interior!
The most common spots (pun intended) on car upholstery are food stains, coffee stains, and crayons.
Cleaning these can be a tricky business because they tend to be tough to remove.
The easiest way to deal with most of these stains is by using soap and water or an upholstery cleaner.
If it’s sticky then you’ll want to use something like Turtle Wax OXY Interior 1 Multi-Purpose Cleaning. It has an advanced cleaning formula that deep cleans and deodorizes your car’s interior surfaces.
This revolutionary product has a one-of-a-kind scrub brush for deep, targeted cleaning in the tiniest of spaces.
Step 9 – Dry out the car
After all, the cleaning, vacuuming, and scrubbing are done, you’ll want to make sure that your car is dry.
The easiest way to do this is by opening all the doors and letting them hang out for about a day.
Another trick that we recommend is using some lint rollers on any upholstery or fabric surfaces in your vehicle after cleaning it.
This will help soak up any extra moisture or dirt that’s left behind.
Just be careful not to use too much pressure when rubbing. The friction could leave behind some fibers of lint!
Step 10 – Freshen up the car
Finally, you want to make sure that your car smells good for the next time you use it.
Open all of the doors and put on a new car air freshener to get rid of any unwanted odors.
Tips and Tricks for a Quick and Easy Cleanup
Here are some bonus tips and tricks that will help you keep your car clean!
Tip 1 – Occasional Cleaning
It’s best to clean your car every few weeks.
This will ensure that you don’t get too carried away with the cleaning process and waste tons of time and resources.
Just make sure that you use the vacuum attachments mentioned above!
Tip 2 – Keep a bag of trash in your vehicle
This is another tip I learned from my dad! The next time you’re out on a trip somewhere, grab up all of the trash that you find rolling around under seats or by your feet.
Store it in a Ziploc bag until the next time you need to clean out your vehicle or whenever you’re ready to take it to the dumpster outside of your home.
That’ll save you from having to carry this trash around with you everywhere!
Tip 3 – Deal with spills and messes quickly
If your kids spill their juice or you accidentally knock over a drink while trying to get into your vehicle, then you must deal with the spill immediately.
Don’t let things sit.
This will only make the problem worse! So rinse out any liquids as soon as possible and blot them dry if they’re still wet.
Tip 4 – Run Cleaning Routine for Cars twice a year
It’s best to run through this cleaning process every 6 months or so.
It’ll keep your car looking great at all times and will ensure that it doesn’t feel too cramped when you have passengers inside of it.
It’s also important to do this in the winter and summer because you may need some different supplies for each season (I’ll touch on that in the next section).
Tip 5 – Invest in auto detailing tools and equipment
If you like having things clean, then you may want to invest in professional-grade auto detailing equipment.
This will help keep your vehicle looking great regularly but may take a long time to learn how to use.
It’s worth the effort though if you can find something that’ll help keep your vehicle looking great!
Don’t know where to start? Check out our car carpet extractor buyer’s guide, or check out the products below:
For Winter Cleaning, you should:
Wrap up your leather, vinyl, or cloth seats with a plastic bag before strong winds get behind them and freeze.
During the deep snow and freezing temperature days, always take an alternative route home to avoid unnecessary salt from piles of plowed snow being tossed onto your car by other vehicles.
Use wet wipes during snowy weather to better clean windows and mirrors. Go ahead and rinse off both of these surfaces as well so they aren’t covered with streaks!
A few simple swipes are all it takes to remove any leftover dirt or salt. Use a little bit of car wax to keep your car’s paint looking good and protected against the elements.
For Summer Cleaning, you should:
Stay hydrated and do this in the shade. Clean your car only at times when it’s not too hot out, like early in the morning or late at night.
Use a water hose to wet down any dust that’s accumulated on its surface. This will cause it to fall right off!
Use soft cloths to buff your car paint back up, especially after removing any wax used in the winter months.
Run a damp towel overall vinyl and fabric surfaces so that they’re clean and free of any leftover dirt from where you were cleaning with wipes earlier.
Conclusion
And that’s it, in this guide you have learned how to clean in between car seats and other areas of your vehicle!
Cleaning can be a pretty frustrating task sometimes, so I hope that this guide will help you out throughout the next time you find yourself needing to do some cleaning!
Cleaning is a great way to maintain any vehicle’s appearance. This applies to both your sports cars or even work trucks. Clean vehicles are happy vehicles!
If keeping your car squeaky clean all of the time is something that you’re interested in doing then we have plenty more guides on similar topics that’ll help you become a cleaning pro in no time at all.
